Synology NAS boxes have a nice looking web interface DSM. Synology calls it a web based operating system.
In DSM you can install applications. One of them is Hyper Backup.
As name suggests, it allows backing up the NAS.
You can back up to a lot of different destinations, including other S3 compatible Storage like Storadera.
NB! Synology Cloud Sync is known to have compatibility issues with 3rd party cloud providers. If you need backup then please use Hyper Backup.
Steps for backing up Synology NAS to Storadera
First start Hyper Backup. If you do not have any backups configured then it will automatically open a new backup wizard. If you have any existing backups then click on the “+” (plus) button to start a new one.
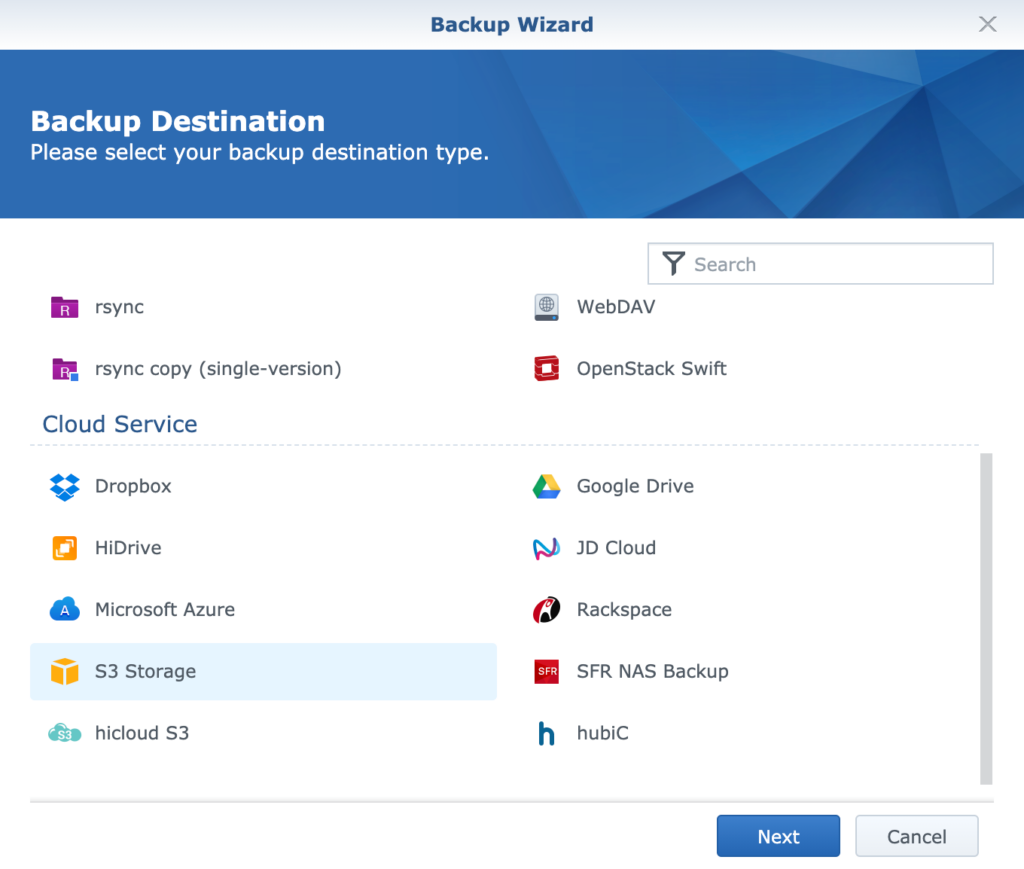
1. Select “S3 Storage” as your backup destination and then click Next.
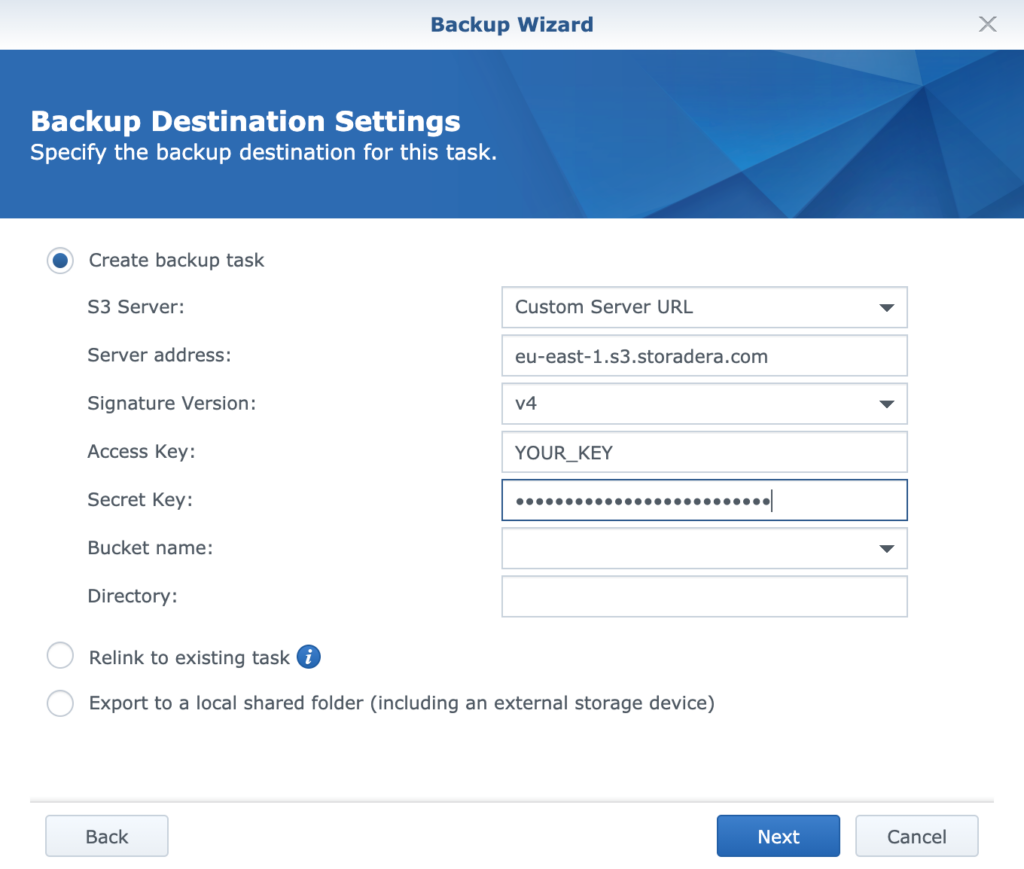
2. Add backup destination settings:
S3 Server: Custom Server URL
Server address: eu-east-1.s3.storadera.com
Signature Version: V4
Access Key and Secret Key you can get from account.storadera.com/key
Bucket name: Create a new bucket or select existing one
Directory: This is automatically filled but can be changed as well.
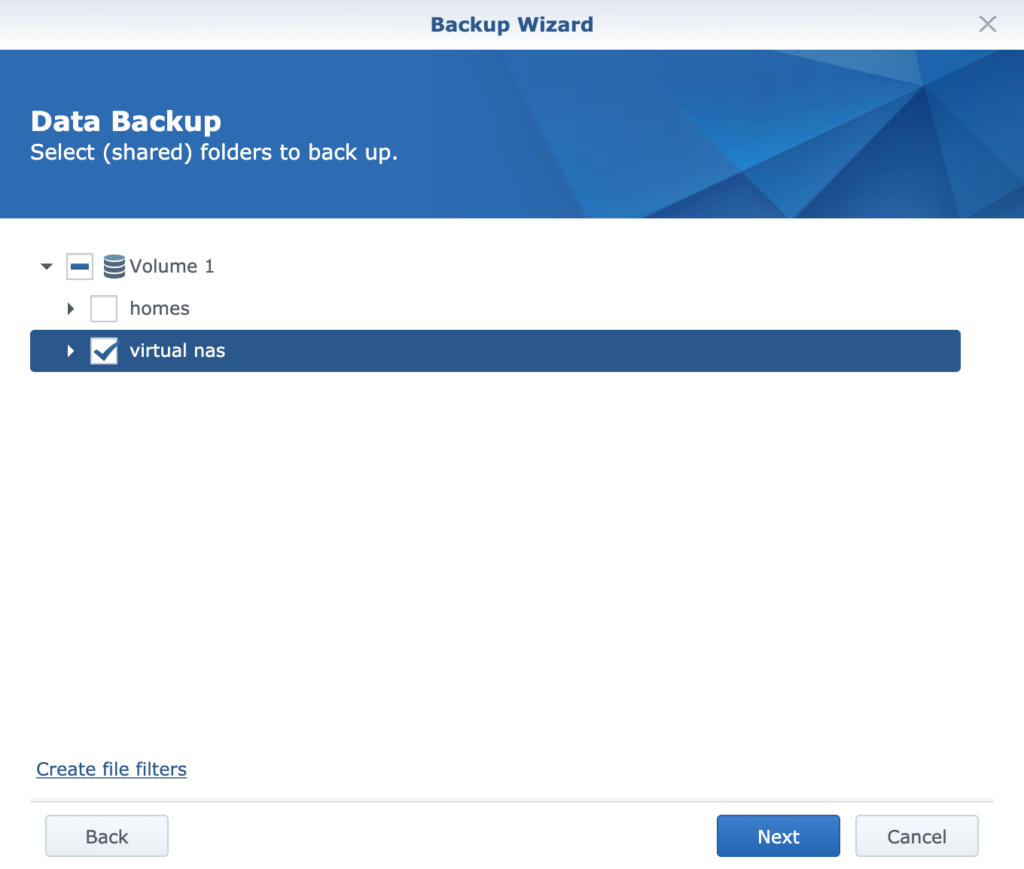
3. Select the folders to back up
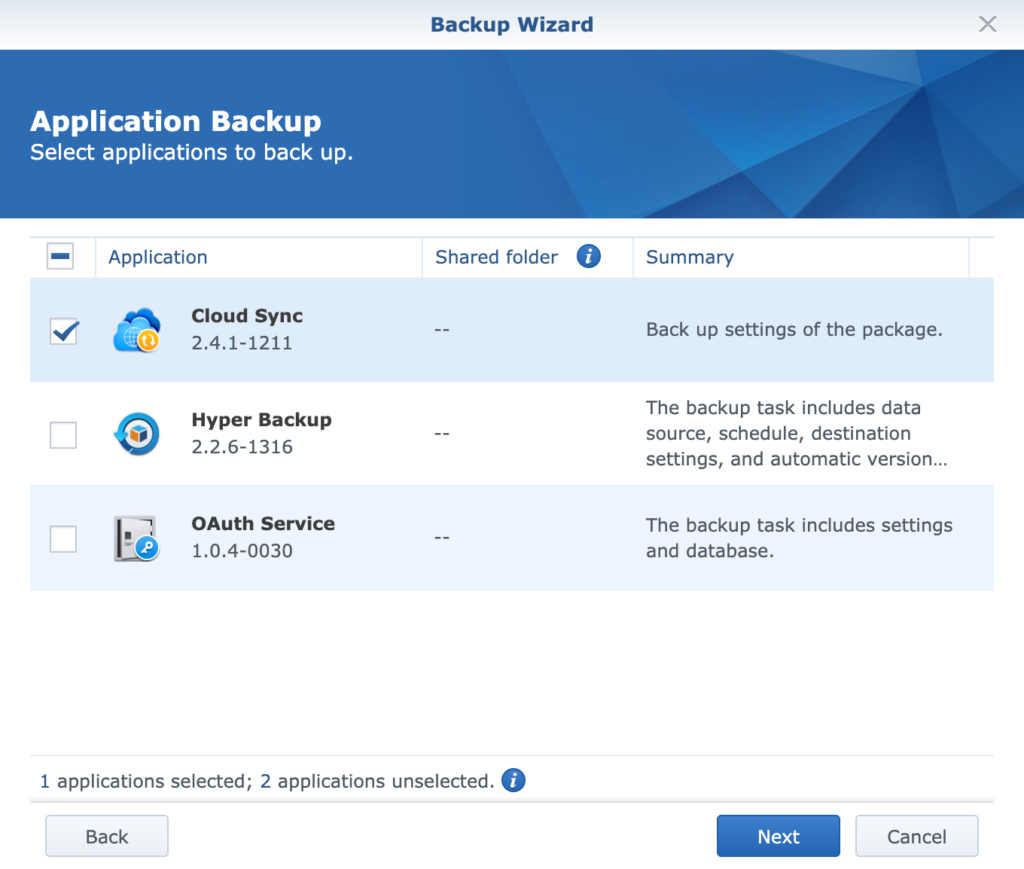
4. Select the applications to back up.
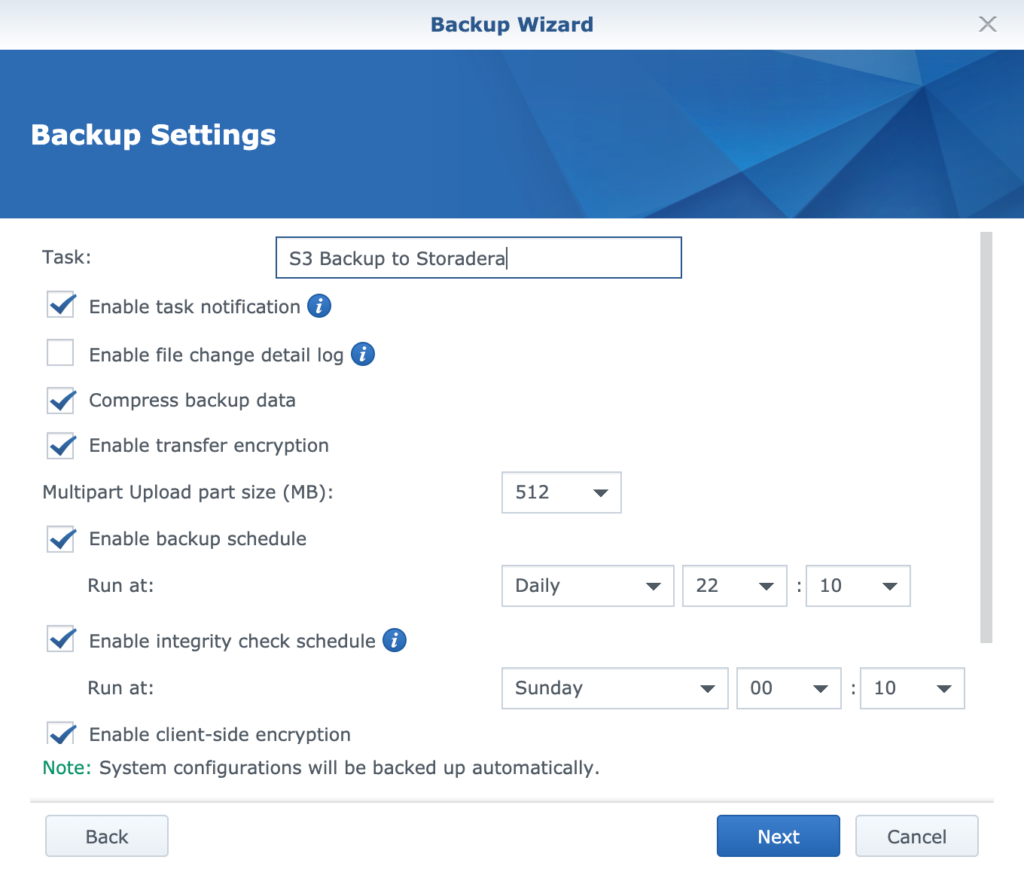
5. Backup settings.
NB! It is mandatory to check “Enable transfer encryption” to make it work with Storadera. For added security Storadera only supports secure transfer.
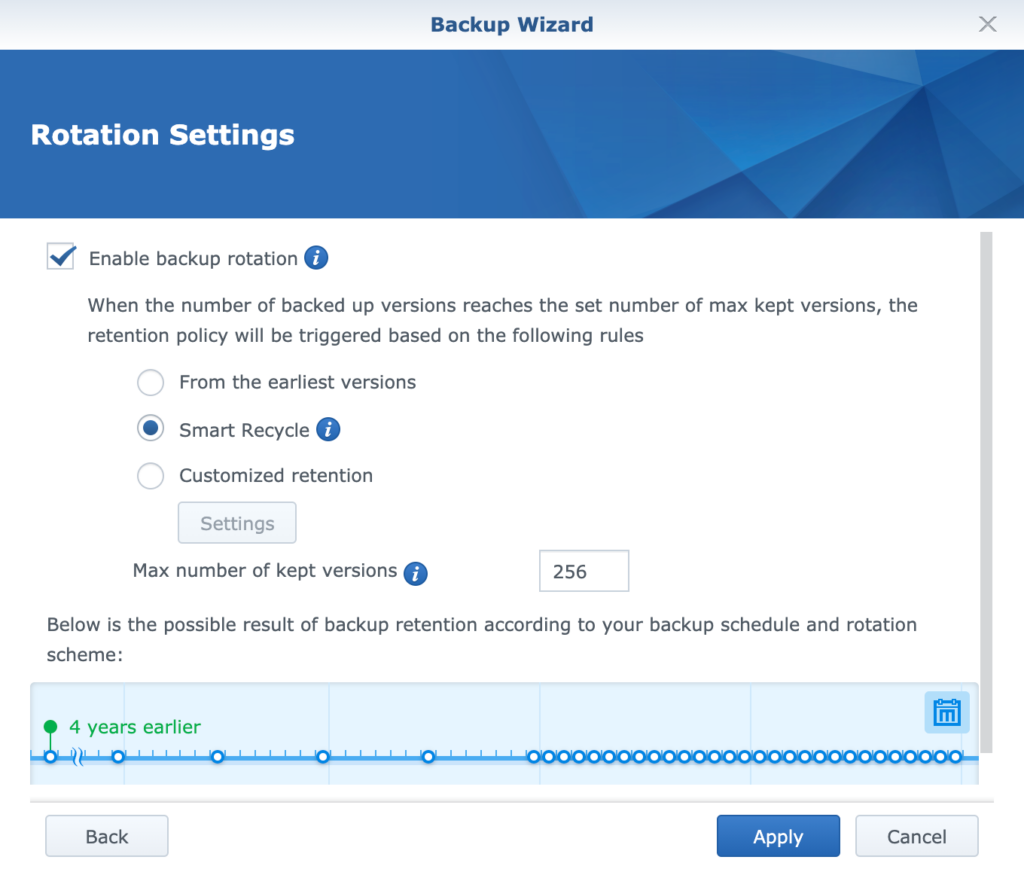
6. Select rotation settings.
6.1 If you selected “Client side encryption” in step 5 then you are offered to download the key file.
6.2 You are offered to run the backup right now. Do it and you’ll see if everything is working well 🙂
Happy backing up your Synology NAS to Storadera!
